
Sculpted Buttercream
- dasmakescakes
- Jun 28, 2023
- 2 min read
Updated: Jul 9, 2025
I started seeing this trend doing the rounds on Instagram and it truly awakened my creativity. Filled with ideas of how I could bend the trend to my imagination I realised that the first step was finding out how to actually make what is known as buttercream clay.
No, you do not just build up your regular buttercream onto a cake, though I believe some of my peers have successfully adapted that method; true sculpted buttercream creations utilise a consistency closer to fondant but more supple and less prone to cracking.
I searched high and low and finally stumbled across a recipe that essentially indicated that my answer lay in my usual American buttercream but altering the ratio of the dry to wet ingredients. Essentially, the key is to keep adding icing sugar until you achieve the consistency you want. Then once it's soft and pliable you can knead it and colour it ready to mold.
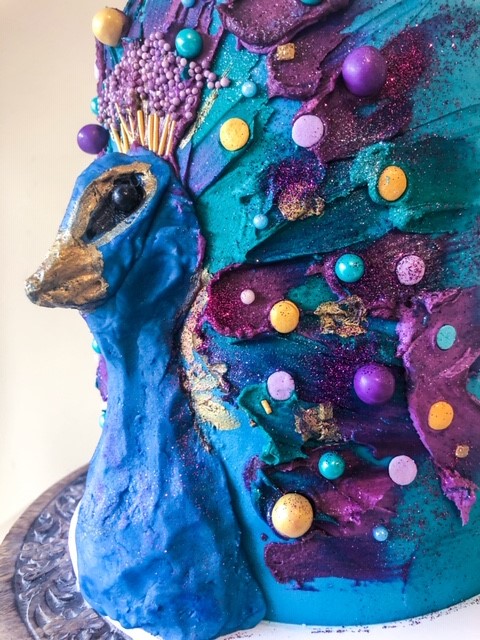
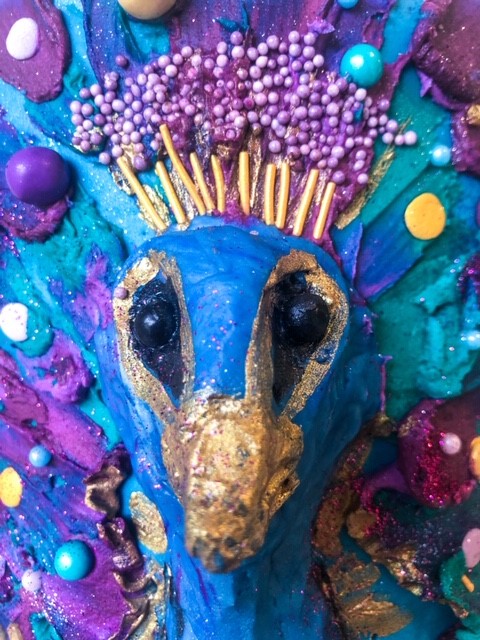
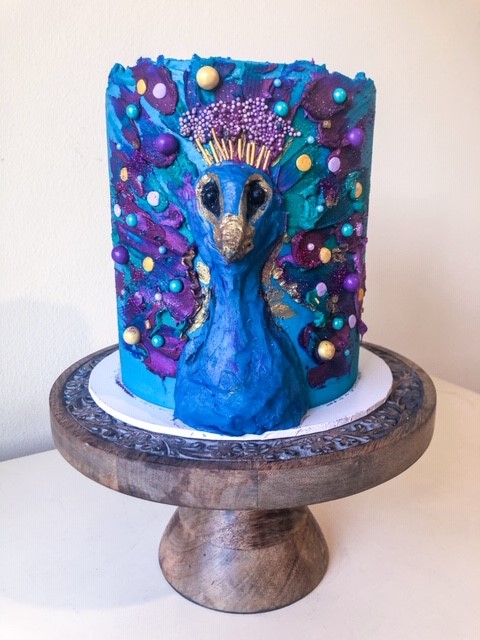
I found that it adhered pretty easily to my cake and once on was easy to mold into the shape I had envisaged. I can't wait to try out more designs with my newfound buttercream iteration.
Here's the recipe I used for anyone else wanting to give it a go:
113g soft unsalted butter 1 tbsp milk pinch of salt dash of vanilla extract 4-5 cups icing sugar (powdered sugar) gel food colouring
Combine the butter, milk, vanilla and salt in a bowl. Mix well. Add the sugar one cup at a time until the mixture resembles a dough - you don't want it to be sticky but not too dry. You can then tint the dough with your choice of food colouring and knead until it's smooth and supple and ready for molding.
I split my dough and stored the other half (uncoloured) in a ziplock bag in the fridge. It does harden in the same way as regular buttercream so let it come to room temperature when you're ready to use it again.
Let me know if you try it out!


Comments